Monday, December 19, 2011

Closed: Shabby Apple GIVEAWAY!!!

I'm soo excited to offer a fabulous giveaway from Shabby Apple! They have tons of great clothing and some of the cutest vintage jewelry out there!

I love the Honey Bee Necklace.


And I have a little obsession with birds so of course I'm in love with the Sparrow Earrings.


NOW FOR THE GIVEAWAY!

Shabby Apple is giving away this beautiful Light As A Feather Necklace to one lucky All Things Homie Reader!!


Two Ways To Enter:

1. Check out Shabby Apple and tell me your favorite item in a comment below!

2. Like Shabby Apple on FB and let me know you did in a comment below!

You must be an All Things Homie follower to win!

The winner must have a US shopping address and there will be no exchanges for the winning piece of jewelry.

AND....

Shabby Apple already has great prices, but they are also offering a 10% discount to All Things Homie Readers with the code "allthingshomie10off"!
Perfect for some last minute holiday shopping!!

GOOD LUCK!!

The winner will be announced Wednesday so make sure you enter!


Wednesday, December 14, 2011

The Kitchen is Finished~!

Well for now anyways... we are planning on replacing the countertops and backsplash sooner than later, but I think we both need a break!

It's been a while since I last updated about our kitchen progress, but last weekend we finally had to time to work on the last few finishing touches.

If you remember from this post about painting the cabinets, our kitchen used to look like this.


We moved the upper cabinets, painted the cabinets white, installed new hardware, installed crown moulding, moved some electrical, ran gas to the new oven, patched and textured, painted, and got new appliances and I couldn't be happier with the result!


It looks like a whole new place! It's amazing what a little paint (and pretty appliances) can do.

Tuesday, December 13, 2011

Easy Fabric Storage

This is one of the simplest projects, but it has already made a huge difference in my craft room. I don't know about you but I have tons of left over fabric, it's hard for me to keep track of what I have so I usually just end up buying new. I've been keeping it in a plastic storage bin, but it just ends up in a huge pile and I have to dig through it to find what I'm looking for.

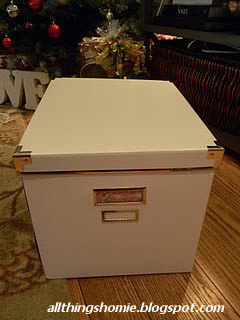
I went to Ikea last week and stocked up on their white office boxes. I thought these large ones would be perfect for my fabric storage.


I used scrap cardboard and cut TONS of pieces into 11" squares. Then I simply wrapped each piece of fabric around it and secured the end with a pin.


File them away in the boxes. I kept one box with whites/neutrals and the other for colored fabric.


Don't forget your favorite helper. He always likes to be in the middle of what I'm working on = ).


SO much better! The boxes easily stack and can be put away, but it will be so nice to pull them out when I'm working on something and be able to find just what I need!


I'm working on purging and organizing the rest of my craft room, I'll show you the reveal soon!

Monday, December 12, 2011

Christmas Pillows

 Over the weekend I made several Christmasy pillows for my mom. I've had the fabric for awhile and finally made a trip to Ikea this week to pick up pillow forms.

I made this Peace On Earth pillow.


The front is made with a piece of canvas. I used a freezer paper stencil to paint the lettering. It amazes me how crisp the paint comes out, no smudges!


While I waited for the paint to dry, I used my serger to cut some upholstery strapping in half.


I ended up with this.


I pinned the strapping all the way around the front piece of the pillow and stitched along the edge.


I used red and white striped canvas for the back. Like the poinsettia pillow, I made these covers so they could be easily removed. Pin both back pieces and stitch down.


Turn right side out and stuff with the pillow!


I also made a simple plaid pillow using the same technique. Instead of painting lettering on the front, I stitched a piece of upholstery webbing down the middle before I attached the back panels.


I'm sure you've seen these around blogs and even in stores. I recycled an old red sweater to make this one.


I love the knit texture and making it was so easy. First lay out your sweater and place your pillow.


I wanted to use the finished edge on the bottom of the sweater so I lined the pillow up at the corner. Then cut out your square and stitch the sides, leaving the bottom open.


I stuffed the pillow inside and covered the open edge with an extra strip of the sweater. I stitched a few pieces of red ribbon to act as ties for the open edge.

You could easily sew the edge closed, but I liked the added interest of the ribbons.

Lastly, I made a little striped NOEL pillow to throw in with the others.

I love that they are all so different, but have something in common. That's what makes them work together without being too matchy.

Are you working on any holiday sewing projects?

Friday, December 9, 2011

Krylon Glitter Blast Transformation

This year I decided to change up our Christmas decor a little bit. In the past we've had an assortment of bright colors, but this year I went through all 15 storage tubs and decided to stick with red, green, and silver.

I put away a lot of our gold decorations, but there were a few things I still wanted out. I had been itching to use the silver Krylon Glitter Blast I picked up awhile ago and this was just the project.

We've had this Pier One gold present box for a few years so I decided to give it a glitter blast makeover.


I wasn't sure how it would take since there were so many thin metal pieces and it already had glitter chunks so I gave it a base coat of silver paint. After seeing how well the glitter blast coated, I probably shouldn't have bothered!

After a few thing coats I was amazed at the transformation!


It looks great on our fireplace. You would never even know it didn't come that way!


I'm trying hard not to Glitter Blast everything!

Wednesday, December 7, 2011

Shutterfly Christmas Cards

I'm a little late, but I finally got our Christmas cards ordered from Shutterfly. Over a month ago I won 25 free cards from Thrive and I should have done them weeks ago, it was so easy and I can't wait to get them sent out to our friends and family!

Seasonal Chic Christmas Card
Creating Christmas cards has never been this easy.
View the entire collection of cards.


Tuesday, December 6, 2011

Krylon Looking Glass Spray Paint

I love the look of Mercury Glass and was so excited when Krylon came out with their Looking Glass spray paint. I haven't expiremented with it very much, it certainly dresses up plain glass, but so far I haven't been able to get the exact spotty texture I love.

I took this plain glass vase and gave it a few quick coats.

Before

After

I added some prelit silver branches I picked up from Bed, Bath, & Beyond and filled in the rest of the vase with mini red ornaments.


Monday, December 5, 2011

Burlap Advent Calendar

After I posted about my burlap runner, I wanted to incorporate burlap in a few more places around our house. I love all the advent calendars I've been reading about lately and figured a burlap pennant banner would be the perfect project!

I started by determining the dimensions for each pennant. Since I needed 25 of them I had to make each one relatively small. I decided on 3" wide and 4" tall.

I cut a section of burlap 4" wide and serged each side to help limit the unraveling while I was cutting.


Then I created a template for each pennant. I did this by cutting a 3" by 4" rectangle. I folded the 3" side in half and cut from corner to corner to make a pennant shape.


Discard the small triangles and use the middle section as your template. I flipped it back and forth to cut out 25 pennants.


Then I serged the 2 raw edges of each pennant.


To add the numbers I used my silhouette to cut stencils out of card stock and painted them on with red metallic paint and a Martha Stewart blotter.


While I waited for the paint to try I sprayed a mini clothespin with Krylon Glitter Blast spray paint, this stuff is amazing and really does look like pure glitter, not like other glitter paints I've used in the past.


Then it was time to attach all the pennants together. I used a piece of jute twine and zig zag stitched it on top of each pennant, making sure I kept them close together.

I made another one for my mom using ribbon and you could even glue them on if you didn't want to sew.

Then it was all ready to be hung up!


The clothespin acts as your marker and you move it each day to mark the countdown to Christmas!


Thanks for stopping by!