You probably don’t remember since it’s been WEEKS since I posted Part 1 of my antique dresser project, but I finally have her finished! If you’d like a recap, read all about her here.
Once I had finished stripping, sanding, and cleaning her she was all ready for a coat of stain. I kept the color dark and close to the original since I’m putting her in our sun room which already has a few rich wood pieces.
The stain was very easy to apply; I just cut up one of my husband’s old shirts, dipped it in the stain and rubbed it in. After I let it sit for about 15 minutes, I wiped off any excess with a clean cloth.
Again, this was a learning experience, so next time I will definitely wear gloves. This is what my fingers looked like by the time I was done and it took some serious scrubbing to get it off!
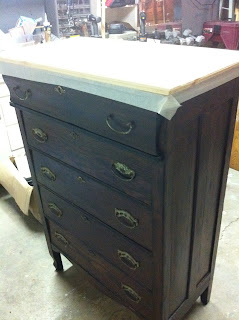
After the stain was dry, the dresser got 2 coats of polyurethane for protection. Here is the dresser after stain and poly:
While I waited for that to dry I decided I would try to clean up the old hardware.
I was planning on painting the old pieces since I’m not a fan of brass, but after some soap and water and a good scrubbing they looked like this:
I was planning on painting the old pieces since I’m not a fan of brass, but after some soap and water and a good scrubbing they looked like this:
I love the character and aged look so I decided to leave them as is.
I also covered the new drawer bottoms my dad cut with contact paper. I had already sanded down the inside of the drawers to make sure they were smooth, but this will help protect the tablecloths and other things from getting snagged.
My dad secured the new pine top on my dresser and I was originally planning on using a white wash and staining a design on top. I taped off the top and mixed a bit of tan paint, white paint, and water.
Once it was on, I decided it was too much of a contrast with the dark wood so I tried plan B. Instead of staining the design I put the vinyl cut outs on the top and stained over them. Similar to this table I saw at Christina’s Adventures!
Once it was on, I decided it was too much of a contrast with the dark wood so I tried plan B. Instead of staining the design I put the vinyl cut outs on the top and stained over them. Similar to this table I saw at Christina’s Adventures!
I cut out the design using my Silhouette machine. It has definitely been worth the investment, the possibilities are endless with that thing!
After several days and coats of stain I was finally able to peel off the vinyl design and expose the lighter color underneath. The top also got a few coats of poly and I didn’t wait for the stain to be completely dry so the colors would kind of bleed into each other.
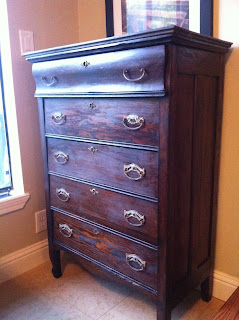
And here she is!
I still need to move the picture that is hanging behind her and decorate that corner, but I love how she turned out and I can’t wait to fill her with all kinds of fun things!
Not bad for my first serious restoration project. Have you redone any furniture lately?
I'm linking up to Primp, Catch a Glimpse Party, Show and Tell, and Thrifty Thursday!
I'm linking up to Primp, Catch a Glimpse Party, Show and Tell, and Thrifty Thursday!


Wow, what a transformation. It is a lovely dresser and now it's fantastic. I like the design you used and the effect of the different stains. Bravo!
ReplyDelete