Wednesday, December 28, 2011

The Best of 2011

I can't believe it's almost 2012~! It seems like just yesterday that I dove into the world of blogging, the past 6 months have been such an amazing experience for me and I want to thank every single one of my readers! You give me so much encouragement and inspiration, I wish I could turn this into my full time job!

Here is a little recap of some of my favorite projects over the past 6 months.

June

The Start of My Craft Room


July


August


September


October


November


December


Thank you for following along on this journey with me! It's been quite a year and I have big plans for 2012!

Tuesday, December 27, 2011

Glass Etching

I'm sure you've seen these personalized Pyrex dishes all over blogland and pinterest, but they are such a good gift idea, I couldn't help but make a few this season!

I've used the etching cream for several projects in the past, but this one was one of the easiest since the sides are relatively flat. Sometimes it difficult to get the stencil to stick properly to a curved edge.

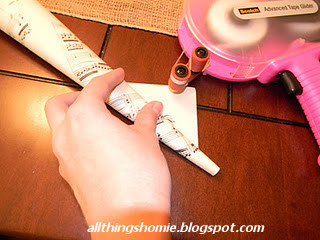
I started with a large Pyrex dish and cut out my brother-in-law & sister-in-laws's last name and a large letter A using contact paper and my Silhouette.

Stick these down on the outside and bottom of the dish (you don't want the etched edge to be inside where food will be). Some letters will need to be cut out backwards so they will show correctly on the bottom of the dish.

Once you've pressed down the stencil and made sure all the edges are secure, cover the stencil generously with etching cream. I believe the package says to leave it on for 5 minutes or so but I always wait at least 15 to make sure it has plenty of time to etch away...

Since the cream isn't cheap I scrape off the excess and put it back in the bottle. Then give the dish a good rinsing, peel off the stencil and wash it again. You don't want any extra cream eating away at the glass.

Then I did the same process for the letter A.


I added some delicous Tastefully Simple spinach dip and holiday napkins and it's a great personalized gift that they will put to use!

Sunday, December 25, 2011

Merry Christmas!

Hope you are all enjoying a nice, lazy, relaxing day with the ones you love! We have been blessed this Christmas and can't wait to see what 2012 has in store for us!

Wednesday, December 21, 2011

Shabby Apple WINNER!

Thank you so much to everyone who entered to win this beautiful necklace from Shabby Apple!


And the winner is....

True Random Number Generator

Min:
Max:

Result: 13

Powered by RANDOM.ORG

Congratulations...
Jessie Lynn said...
Mine has to be the turquoise ring you posted! Have been lemming one for ages. My mom used to wear one just like it. Fingers crossed so hard! XXOO
 

Magnetic Refrigerator Organizer

I finished up a quick and easy project I just had to share! I've been wanting a whiteboard/calendar in our kitchen, but with our new fancy refrigerator I wanted something simple without having to clutter up the kitchen.

I posted about my cubicle makeover where I made this simple whiteboard and I figured I would make a similar version for our kitchen.

I started with a large frame (which I painted white), assorted scrapbook paper, and a blank calendar printed from Word.

I covered the cardboard frame backing with 2 pieces of scrapbook paper.

I trimed the calendar edges and mounted it on a piece of scrapbook paper.


Then I cut out a few different sized pieces of paper to use as note pads at the bottom. Originally I was going to put titles on each of them like "Birthdays", "Groceries", and "To Do" but I decided to leave them blank so I could use them for whatever purpose suited at the time. I'll just write in the title with my whiteboard pen.

Clean the glass and assemble the frame and you have an easy white board!

I attached several extra strength magnets on the back with hot glue so it would stay up on my fridge and now I have a great place to keep track of birthdays and things we need!


Tuesday, December 20, 2011

Music Wreath

I've seen these all over blog land and couldn't believe it when I went to a craft fair and they wanted $64 for one! A good friend loved it so I promised her I'd make her one. Mine cost a grand total of $2.

I started with an old book of sheet music ($1.50 at goodwill), my tape gun, paper cutter, and a glittery poinsetta ornament from the Dollar Tree.

I pulled out the sheet music and trimmed it down so it was 8.5" x 11".

Then I rolled each piece into a cone and taped the last corner to hold it together.


Repeat, repeat, repeat.

Once I had about 20 done I assembled them on a small piece of poster board with hot glue. I kept making more and layering them as I went until the wreath was full enough. I kept mine all one length, but you could do varying sizes to give it more texture.

I cut out a scalloped edge circle to cover up the middle and then added the glittery poinsetta.

Then attached a piece of twine on the back to hang it up.


I don't know who would pay $64 for one of these, but it was so easy I guess I better get in the business!